


How to Install Roof Windows: A Step-by-Step Guide
Installing roof windows can dramatically improve natural light, ventilation, and the overall aesthetic of your home. Whether you’re aiming to brighten up an attic, loft, or simply want to enhance your living space, roof windows are a practical solution. This guide will walk you through the process step by step, covering essential preparation, safety tips, and the installation of both standard roof windows and flat roof skylights.
Understanding Roof Windows and Flat Roof Skylights
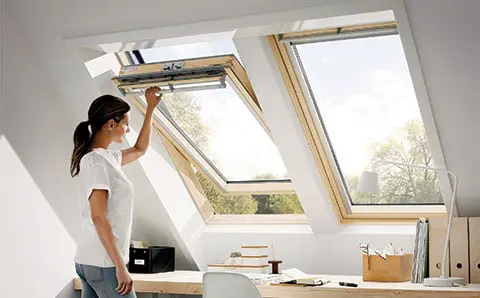
Before diving into the installation process, it’s important to understand the differences between roof windows and flat roof skylight. Roof windows are designed to be integrated into pitched roofs and can often be opened for ventilation. Flat roof skylights, on the other hand, are primarily used on flat or nearly flat roofs, providing natural light without the need for additional structural modifications.
Choosing the right type depends on your roof structure, the amount of natural light you want, and your desired ventilation options. For instance, flat roof skylights are perfect for rooms with low-pitched or flat roofs, while traditional roof windows suit sloped roofs.
Preparing for Installation
Preparation is a crucial step to ensure a successful installation. Begin by assessing the roof structure and checking for any obstacles like beams, chimneys, or electrical wiring. Measure the area where you plan to install the roof windows accurately, taking into account the frame dimensions and clearance requirements.
Safety is paramount when working on a roof. Make sure to use sturdy ladders, harnesses, and protective gear. If the roof is steep or high, it might be best to consult a professional. Additionally, check local building codes and regulations, as certain installations may require permits.
Selecting the Right Roof Windows
The market offers a variety of roof windows and flat roof skylights, differing in size, style, material, and functionality. When selecting a roof window, consider energy efficiency, ease of operation, and durability. Modern options often include double or triple glazing for insulation, low-maintenance frames, and integrated blinds.
Flat roof skylights should be weather-resistant and designed to handle water runoff efficiently. Look for skylights with proper flashing kits, as they prevent leaks and water damage. Choosing high-quality products ensures longevity and reduces the risk of costly repairs.
Cutting the Roof Opening
Once you have the roof window and tools ready, mark the position of the opening on the roof. Double-check measurements to ensure the window will fit correctly. For pitched roofs, you’ll need to remove a section of the roof covering, including tiles or shingles. For flat roof skylights, the procedure involves cutting through roofing materials while maintaining the integrity of the waterproof membrane.
Use a saw suitable for the roofing material and cut carefully along the marked lines. Reinforce the surrounding roof structure if necessary, especially if removing large sections of timber. This reinforcement helps support the weight of the window and prevents sagging or leaks.
Installing the Frame
The next step is to position the roof window frame into the opening. Begin by placing the frame carefully, ensuring it is level and aligned with the roof slope. Secure the frame using screws or brackets recommended by the manufacturer. For flat roof skylights, ensure the frame sits firmly on the roof deck and that all corners are sealed properly.
Check the alignment once more, as even a slight tilt can cause water pooling and operational issues. It’s often helpful to have an assistant to hold the frame while you secure it. Proper installation at this stage prevents future problems and ensures smooth operation of the roof window.
Installing Flashing and Waterproofing
Flashing is critical to prevent water leakage around roof windows. For pitched roofs, install the flashing kit that comes with the window, following the manufacturer’s instructions. This typically involves positioning the top and bottom flashing pieces and sliding the side pieces into place. Seal any gaps with roofing sealant.
Flat roof skylights require a waterproof membrane around the frame. Apply the membrane according to the skylight instructions, overlapping the edges to direct water away from the opening. Ensure all seams are tight, and corners are sealed thoroughly. Proper flashing and waterproofing are essential to protect your home from leaks and water damage.
Fitting the Roof Window
With the frame and flashing in place, install the window sash or glazing panel. For operable roof windows, check the hinges, handles, and locking mechanisms to ensure smooth operation. Flat roof skylights may come as fixed units, in which case installation focuses on secure placement and sealing.
After fitting the window, apply any additional seals or trims provided. These trims not only enhance the aesthetic finish but also improve thermal insulation and prevent drafts. Double-check that the window opens and closes correctly and that all locking features function as intended.
Interior Finishing
Once the exterior installation is complete, focus on the interior. Install the interior lining or frame to cover gaps between the window frame and roof structure. This step improves insulation, enhances appearance, and prevents air leakage. You may also choose to install blinds or shades for light control and privacy.
Finishing touches like painting or staining the interior frame help integrate the roof window with your room’s décor. Ensure the insulation around the window is adequate to prevent heat loss, especially in colder climates.
Maintenance Tips for Longevity
Proper maintenance extends the life of your roof windows and flat roof skylights. Regularly clean the glass to maintain clarity and check seals and flashing for signs of wear or leaks. Lubricate moving parts of operable windows to ensure smooth function.
For flat roof skylights, inspect the surrounding roof area for debris accumulation or water pooling. Promptly address any issues to avoid damage to both the skylight and the roof structure. Scheduled inspections and maintenance keep your windows performing optimally for years.
Conclusion
Installing roof windows and flat roof skylights is a project that enhances natural light, ventilation, and overall living comfort. By carefully preparing, selecting the right products, and following the correct installation steps, you can achieve professional results even as a DIY enthusiast. Remember that safety and precision are key, and investing in high-quality materials ensures long-lasting performance. Whether brightening an attic or adding style to your home, roof windows and skylights offer a practical and attractive solution for modern living spaces.
This guide has covered everything from preparation, selection, cutting, and installation to finishing and maintenance, giving you the confidence to install roof windows successfully and enjoy the benefits of brighter, more open spaces.